Brewing Ravnica Allegiance
We've reached the end of the first official week of Ravnica Allegiance spoilers, and while it's probably premature, since we still have a ton of new cards left to be revealed, it's time to start brewing! Guilds of Ravnica was a powerful Magic set, and it seems like Ravnica Allegiance will follow suit, giving us five new playable guilds and a ton of sweet new cards to shake up Standard.
While there are a bunch of new decks I'm looking forward to building with new Ravnica Allegiance cards, today we're going to take a look at five I'm especially excited for, mostly for Ravnica Allegiance Standard but one for Modern as well. While all of these decks are subject to change once we get the rest of the set or as the result of playtesting, even in their current, potentially unfinished forms, all of these decks at the very least seem fun and semi-competitive, and if things break right, some of them might end up being very good! Anyway, without further ramblings, here are five decks that I can't wait to try out once Ravnica Allegiance is released!

Birthing Pod is a notoriously broken card, not because tutoring up value creatures is too good for a format like Modern but because Birthing Pod makes it super easy to assemble creature-based combos. Well, with the printing of Prime Speaker Vannifar, we now have a pseudo-Birthing Pod in Standard! While being a creature is a bit of a downside thanks to summoning sickness and the abundant creature removal in the format, and the fact that you can only tutor for a creature of a specific mana cost (rather than that mana cost or less) is limiting, Prime Speaker Vannifar still has a lot of potential to enable broken things.

Perhaps the easiest way to "break" Prime Speaker Vannifar is by untapping it repeatedly to tutor out several creatures in the same turn. In Modern, Birthing Pod decks used to do this with Deceiver Exarch, Phantasmal Image, and the like to eventually assemble the combo of Kiki-Jiki, Mirrorbreaker and Deceiver Exarch to win the game. While we have to take a jankier route in Standard, we can do something similar with the help of Forerunner of the Empire and the forgotten enrage Dinosaur Cacophodon.


For our combo to work, we need a non-summoning-sick Prime Speaker Vannifar on the battlefield, along with Cacophodon, Forerunner of the Empire, and preferably a random creature for sacrificing purposes (although it's worth mentioning that Prime Speaker Vannifar is by far the most important, since we can use it to tutor up our missing combo pieces). Thankfully, we have Incubation // Incongruity and Forerunner of the Empire alongside Prime Speaker Vannifar to help dig through our deck and tutor up combo pieces, which makes the three-card combo a bit more practical than it might seem at first glance.

After we assemble the combo, winning is pretty straightforward. We can simply sacrifice a random (non-combo piece) creature to tutor up a Dinosaur, which will trigger Forerunner of the Empire, which pings Cacophodon, which untaps Prime Speaker Vannifar so we can sacrifice another creature (perhaps the one we just tutored up) and repeat the process. Once we start comboing, our first goal is to get a Bellowing Aegisaur onto the battlefield, which gives us a bunch more free sacrifices. Without Bellowing Aegisaur, without a Bellowing Aegiasur our Forerunner of the Empire will kill itself after three Dinosaurs enter the battlefield, but with Bellowing Aegisaur on the battlefield the +1/+1 counters give us five more activations by putting a counter on the rest of our team (and if we manage to have both Bellowing Aegisaurs on the battlefield we go truly infinite). These activations give us plenty of time to set up the win...

![]()

Once we have Bellowing Aegisaur on the battlefield, we need to sacrifice one of our eight two-drop mana dorks to get our one Mirror Image, to copy Bellowing Aegisaur, which then lets us sacrifice one of the Bellowing Aegisaurs to continue our way up the Dinosaur curve. At this point, our plan shifts to finding Polyraptor with our tutor loop (something like sacrificing a Bellowing Aegisaur for a Verdant Sun's Avatar and then sacrificing Verdant Sun's Avatar for Polyraptor). Things get crazy once Polyraptor hits the battlefield, as the damage from Forerunner of the Empire will make us a board full of Polyraptor thanks to the enrage mechanic. Once we've had enough fun, we can tutor up our Regisaur Alpha (sacrificing one of our four-drop combo pieces like Forerunner of the Empire or Cacophodon, which aren't needed anymore), give all of our Polyraptors haste, and kill our opponent.


While not really necessary to our plan, we can do some other fun things if we have specific Dinosaurs on the battlefield as we combo. Assuming we have two Bellowing Aegisaurs to go infinite Silverclad Ferocidons forces our opponent to sacrifice all of their permanents, Verdant Sun's Avatar gains us infinite life, and Ranging Raptors tutors all of the lands out of our deck! While Vannifar Pod Dinos might not be the most practical deck, it has the potential to do some of the most absurd things imaginable in Standard and should be at least somewhat consistent, thanks to having a ton of tutors and ways to find our combo pieces. Plus, regardless of your overall record, the games where you gain infinite life, make your opponent sacrifice all of their permanents, and then win by attacking with a million million-powered Polyraptors are sure to raise some eyebrows at FNM!
Training Grounds is a card that's always been super close to being broken but suffers from the Heartless Summoning problem, where Training Grounds decks typically look insane when they draw their namesake card but horrible when they don't. Enter Biomancer's Familiar. The two-drop is a Training Grounds in creature form, which is oddly a huge upside in Modern thanks to all of the powerful creature tutors in the format, like Chord of Calling and Collected Company.


The idea of Biomancer Combo is pretty simple: our two primary combo pieces are Biomancer's Familiar itself and Eldrazi Displacer. With a Familiar on the battlefield, we can activate Eldrazi Displacer's blink ability for just a single mana. At this point, we have a bunch of different ways to win the game. The easiest combo is to find our copy of Eyeless Watcher, which makes two colorless Eldrazi Scion tokens that can be sacrificed for a mana when it enters the battlefield. We can simply use one of the Scions to activate Eldrazi Displacer to blink Eyeless Watcher to make two more tokens, which gives us not only infinite 1/1 tokens but also infinite mana. With our infinite mana, we can essentially win the game by blinking Kitchen Finks or Knight of Autumn an infinite number of times to gain infinite life, or literally win the game by blinking Thought-Knot Seer enough times to force our opponent to draw their entire deck and lose to drawing on an empty library.


We can also win without Eyeless Watcher, but it's a bit more convoluted. If we have a Nest Invader (which makes one Eldrazi Spawn when it enters the battlefield), we can blink the Nest Invader itself an infinite number of times by using the Eldrazi Spawn's mana to activate Eldrazi Displacer. This by itself doesn't do much of anything, but throw Anafenza, Kin-Tree Spirit into the mix, and we also get an infinite number of bolster triggers (the trick here is to keep activating Eldrazi Displacer with the bolster trigger on the stack, or else we'll end up bolstering the Eldrazi Spawn token we need to sacrifice and not making any headway). Eventually, we'll have a thousand or even a million bolster triggers on the stack, and then we can let them all resolve, which makes our team infinitely huge and theoretically lets us win by attacking with whatever random dorks we happen to have on the battlefield.


The key upside of Biomancer Combo, especially compared to old Training Grounds combo decks, is consistency. While we do need two creatures to combo and a third piece to actually win the game, the combination of Chord of Calling, Collected Company, and Duskwatch Recruiter (potentially being activated for just a single mana, thanks to Biomancer's Familiar) means that Biomancer Combo should be really good at finding the pieces it needs to win the game. If there's a downside to the deck, it's that it's not the fastest combo in Modern, with a fast draw winning around Turn 4, which is a turn slower than a good draw from a deck like Storm or Krark-Clan Ironworks. The upside is that the deck plays a lot of good cards and should be able to stay alive against fair decks while we are settings things up. Plus, being in white means we have access to all of the most game-breaking sideboard options in the Modern format to fight against unfair decks, along with blue counterspells to protect our combo pieces from targeted removal.
All in all, Biomancer Combo might have a chance to be reasonably competitive in Modern. The deck was fringe playable with Training Grounds replacing Biomancer's Familiar, and thanks to the fact the deck is really, really good at tutoring up specific creatures and really, really bad at finding a specific enchantment, just switching Training Grounds to Biomancer's Familiar represents a massive boost in power and consistency.
Arcades, the Strategist is a card that I've really wanted to play in Standard ever since it was printed, and while we have played it a little bit for Against the Odds, the Wall deck always had one major problem: the deck does quite literally nothing if you don't have an Arcades, the Strategist on the battlefield, and with only four Arcades (and with our opponents usually knowing that if they kill Arcades, we're left playing a bunch of zero-power creatures that can't attack), the "do nothing" games happen far too often for the deck to really be competitive. Thankfully, Ravnica Allegiance is bringing with it an almost perfect card to support the strategy, in High Alert.

While Arcades, the Strategist is still the best payoff in Arcades Walls thanks to the absurd amount of card advantage it can generate, High Alert is basically a backup Arcades, the Strategist, minus the card advantage. Together, High Alert and Arcades give us eight cards that allow our defenders to attack, which means we should draw at least one pretty much every game, and with High Alert being a much-harder-to-kill permanent type, there's actually a pretty reasonable chance that one of our Wall payoffs will stick around.


Assuming we have an Arcades, the Strategist or High Alert on the battlefield, our deck is filled with some of the most powerful creatures in Standard, with eight Wild Nacatls, eight two-mana Loxodon Smiters, and four two-mana Serra Angels, which is a pretty insane thought. Plus, if we have Arcades, the Strategist on the battlefield, all of our Wild Nacatls and Loxodon Smiters come with a kicker of drawing us an extra card, which means we'll find more Walls and more Wall payoffs, giving us some amount of protection from our opponent killing our High Alert or Arcades.
Otherwise, we have a touch of removal in Conclave Tribunal and Slaughter the Strong (which is amazing in our deck, and we might want additional copies, depending on what the post-Ravnica Allegiance metagame looks like); Vanquisher's Banner as a sort of backup Arcades, the Strategist (since all of our non-Arcades creatures are Walls); and Dive Down, which not only protects our Arcades, the Strategist but is basically a blue Giant Growth, since our creatures will be dealing damage equal to their toughness rather than their power.

Speaking of dealing damage by toughness rather than power, the other upside of High Alert is that it works on all creatures, not just creatures with defender like Arcades, the Strategist, which means if we happen to have both High Alert and Arcades, the Strategist on the battlefield, our Arcades is basically a 5/5 flier for four, which is a pretty solid deal in its own right.
While Arcades Walls still might deal with some consistency issues even with High Alert entering the mix, the deck should be significantly more consistent than it was pre-Ravnica Allegiance, and at least on paper, it actually looks oddly competitive. While it probably won't break into the top tier of the format, it could very well end up being a deck that could go and win an FNM or two, which is pretty exciting, since Arcades, the Strategist is such a uniquely fun card that is more than deserving of some time in the spotlight.
Dovin, Grand Arbiter is a card that doesn't jump off the page as incredibly broken at first glance, but it becomes much more appealing when you consider the amount of synergy available in the format. With the addition of the three-mana planeswalker to the format, we now have a pretty insane artifact-based planeswalker curve, with Karn, Scion of Urza and Tezzeret, Artifice Master following Dovin, Grand Arbiter. While just jamming a bunch of planeswalkers that all care about artifacts is easy, the more sneaky power of Dovin, Grand Arbiter is that it gives us the critical mass of cheap legends needed to take advantage of some extremely powerful cards that can only function with a legend on the battlefield:
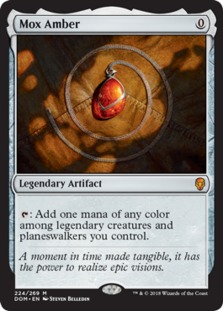


All in all, our deck has a massive 14 legends, which allows us to do a couple of cool things. First, we get Mox Amber, which, alongside Traveler's Amulet, allows us to cut all the way down to 20 lands while also upping our artifact count for Sai, Master Thopterist, Karn, Scion of Urza, and Tezzeret, Artifice Master. Second, our abundance of legends lets us play Urza's Ruinous Blast and Karn's Temporal Sundering—two of the most powerful cards in Standard that don't really see much play because most decks don't have enough legends to cast them consistently. Urza's Ruinous Blast is like a super-answer, taking care of all of the annoying creatures in the format, with the additional upside of exiling things like Arclight Phoenix and getting rid of Conclave Tribunals and Ixalan's Bindings that might be exiling our planeswalkers. Meanwhile, with a ton of planeswalkers on the battlefield, taking an extra turn with Karn's Temporal Sundering is extremely valuable. While just a two-of, Karn's Temporal Sundering is a great tutor target for Dovin, Grander Arbiter's ultimate, which we should be able to reach fairly quickly thanks to Thopters from Dovin, Tezzeret, and Sai.


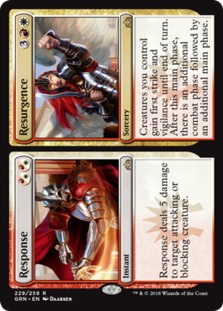
The only downside of the deck is that playing Urza's Ruinous Blast does mean we need to skip out on some good white removal like Ixalan's Binding and Seal Away, which is why we have four copies of Response // Resurgence to deal with opposing creatures in the early game. If this isn't good enough, thanks to the near-perfect mana available in Ravnica Allegiance Standard, it would be easy enough to splash into black or red to take advantage of some powerful non-enchantment-based removal for the early and mid-game.
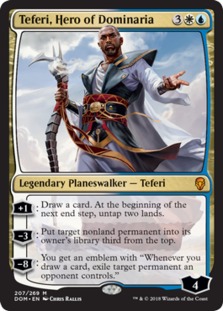

While Artifact Friends looks pretty solid right now, it's possible that it will look even better by the time we finish up Ravnica Allegiance spoilers next week. It seems like artifacts and Thopters are at least a sub-theme for Azorius, which means it's very possible we will get another powerful card or two to add to the deck. Another possibility is to just go straight UW Superfriends and drop the artifact sub-theme. Teferi, Hero of Dominaria is still one of the most powerful cards in Standard, and Oath of Teferi is an intriguing option, although finding a functional mix of five-drops might be a problem in the all-planeswalker build. Regardless, Dovin, Grand Arbiter is a lot more exciting than it looks at first glance, thanks to its synergy in the format and the fact that cheap planeswalkers are key for turning on the powerful "legendary matters" cards from Dominaria.
Finally we have Demon Stompy, a deck that I almost didn't include in today's article because it seems possible we will get another good Demon or two before the end of spoiler season, but it is probably solid enough as is to talk about now, with the understanding that it might improve in the future. With the addition of Spawn of Mayhem and Rakdos, the Showstopper to the format, the curve for a mostly black Rakdos Demon deck is pretty absurd. Assuming we can play a random dork on Turn 2 to speculate Spawn of Mayhem into play, we have Spawn of Mayhem on Turn 3, Demon of Catastrophes on Turn 4, Doom Whisperer on Turn 5, and Rakdos, the Showstopper or Demonlord Belzenlok on Turn 6, which is a pretty insane amount of massive fliers for an opponent to deal with.


The key to making the deck function is some non-traditional ramp creatures on Turn 2. Along with a couple of Dusk Legion Zealots for cycling, we have four Wily Goblins and four Dire Fleet Hoarders. Wily Goblin lets us jump the Demon curve thanks to the Treasure it makes, while Dire Fleet Hoarder gives us an easy creature to sacrifice to Demon of Catastrophes on Turn 4 that also ramps us into one of our powerful six-drop Demons on Turn 5, thanks to the "dies" Treasure it produces.


While the Demon curve is solid as is, having some additional Demons would help with our backup plan of winning with Liliana's Contract. Right now, counting the Demon that comes from Rite of Belzenlok, we have six different Demons in the deck, with Find // Finality to get back dead Demons from the graveyard and Doom Whisperer to surveil for missing Demons, which means it's possible that we'll win with Liliana's Contract, but this plan will probably be somewhat inconsistent. Thankfully, drawing four cards for five mana is a good enough deal that we don't really mind having Liliana's Contract in our deck, even if we only win with it a fairly small percentage of the time. If we get more playable Demons and can diversify up to eight or even 10 Demons with different names, then the odds of lucking into the Liliana's Contract kill will increase significantly, and it might be worth finding room for more copies in our deck.


If there's a problem with Demon Stompy, it's that our early-game Demons don't really do anything the turn they enter the battlefield, so we'll probably have some games where we cast a Demon of Catastrophes or Spawn of Mayhem only to have it die immediately to something like Ravenous Chupacabra, which is pretty painful. Thankfully, our more expensive Demons get around this problem with powerful abilities that do things right away, giving us at least some value even if they immediately die. On the other hand, the power of Demon Stompy is that if our opponent doesn't have the proper removal spells right away, we have a deck full of threats that can end the game in the air in just a few attacks. Simply playing a 6/6 flying, trampler every turn seems like it should beat some decks all by itself, and this doesn't even consider the games where we Plague Wind most of our opponent's board with Rakdos, the Showstopper or draw a new hand with Demonlord Belzenlok.


One last note on the deck: the current build is really focused on the Stompy plan of playing a huge creature each turn, which leaves it without too many slots for removal. While Bedevil is the perfect catch-all answer for the deck, it's possible that when all is said and done, a more controlling build of Demons could be better. In theory, we could cut some of the lesser Demons along with some of the early-game creatures like Dire Fleet Hoarder and Dusk Legion Zealot and overload on removal. One of the upsides of playing Rakdos is that between Moment of Craving, Lava Coil, Bedevil, and Vraska's Contempt, the targeted removal is great, and if the format is aggressive, we also have access to plenty of sweepers, like Fiery Cannonade, Golden Demise, and Ritual of Soot. So keep in mind that if should be pretty easy to switch back and forth between Demon Stompy and Demon Control if the meta calls for it.
Conclusion
Anyway, those are five decks that I can't wait to test out once Ravnica Allegiance is officially released. What are you most excited to build? What cards and combos can you not wait to play with? Let me know in the comments! As always, leave your thoughts, ideas, opinions, and suggestions, and you can reach me on Twitter @SaffronOlive or at SaffronOlive@MTGGoldfish.com.